不懂PHP开发的人制作wordpress皮肤方法完整版(最简单的WordPress皮肤开发教程)
WordPress是一套一流的博客程序,用户量非常大,特别是有很多不懂开发的设计师和重构工程师,他们可以轻松设计一套很好看和很个性的皮肤,但是如何去把它制作成一套好用的皮肤,对于他们来说确实一件很难的事情,这篇文章就是献给不懂PHP开发的人制作wordpress皮肤的完整方法。

我们始终觉得,一步一步的方法是最好的说明方式,以下我们将用最简单的方式,去一步步说明制作方法。
第一步:皮肤的设计和切图需要注意的地方
制作皮肤其实也是一个项目,也分很多工序,虽然是一个人做,但是前面的工序如果没准备好,后面就会付出几倍的时间去解决前面留下的问题
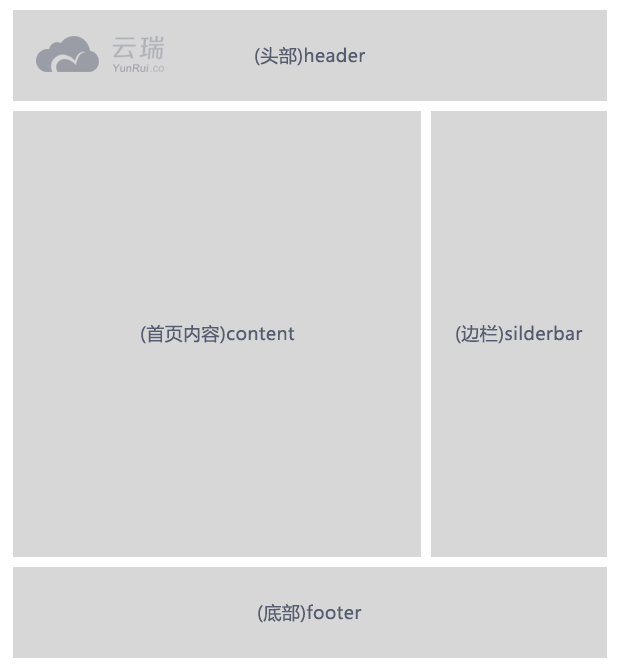
从设计开始,就要注意,大框架必须遵循WordPress的基础模板来,无论你增加多少内容和变化,大框架不变。重构的时候也要考虑到,首页是靠 header 、silderbar、footer和conter几个模块拼起来的,所以重构的时候就配置好PHP环境,把页面后缀写成.PHP格式的,然后分别把首页做成 header.php 、sidebar.php、 footer.php 和 index.php 四个页面。
这样就可以在index.php中用 <?php get_header(); ?> <?php get_sidebar(); ?> <?php get_footer(); ?> 等命令把头部、边栏和底部包含进index.php,content区域的内容要直接写到index.php里,这样可以减少部分重复工作,后续增加相关PHP代码会很方便。
注意:有时候可能还没有皮肤的功能函数,WordPress的包含代码还不可以用,我们可以先用PHP原来的包含代码去实现,如:<?php include_once’header.php’;?>,这样是可以100%在index.php中调用header.php的,但是最后还是要用<?php get_header(); ?>否则有些功能将不可用。
第二步:准备好必备的文件
先配置好PHP环境,安装好WordPress博客程序,皮肤文件夹要放置到 /wp-content/themes/里
一套完整的WordPress皮肤必须必须有以下几个页面文件:
style.css: CSS(样式表)文件
index.php : 主页模板
archive.php : Archive/Category模板
404.php : Not Found 错误页模板
comments.php : 留言/回复模板
footer.php : Footer模板
header.php : Header模板
sidebar.php : 侧栏模板
page.php : 内容页(Page)模板
single.php : 内容页(Post)模板
searchform.php : 搜索表单模板
search.php : 搜索结果模板
这些只是基础的文件,复杂的模板会有更多功能性文件。
wordpress的强大之处就在于,你不一定要每个页面都有他才运行,有些功能模块页面你不做,它就用系统默认的模块来代替。例如:index.php 其实和 category.php archive.php tag.php search.php差不多,所以当你只有index.php的时候,这些页面都会默认去调用index.php的效果来展示,但是这样对搜索引擎不友好,yunrui.co是给每个页面加标题解决这个问题,如:https://www.yrucd.com/category/theoryondesign 和 https://www.yrucd.com/tag/%E5%85%8D%E8%B4%B9%E4%B8%8B%E8%BD%BD 等。
第三步:添加关键页面的代码
1.完成首页的必要代码和模块:
index.php的代码如下(注意,这些函数必须正确嵌套在你的HTML代码中,这里只是展示他们的功能方便你取用):
//调取博客头部
<?php get_header(); ?>
//循环调取日志内容(关键)
<?php if(have_posts()) : ?><?php while(have_posts()) : the_post(); ?>
<!--调取缩略图-->
<?php if ( has_post_thumbnail()) : ?>
<a href="<?php the_permalink(); ?>" target="_blank"><?php the_post_thumbnail(); ?></a>
<?php endif; ?>
<!--调出日志标题-->
<h2> <a href="<?php the_permalink(); ?>" target="_blank"><?php the_title(); ?></a> </h2>
<!--调出日志相关信息(发布时间、作者和编辑文字链接等)-->
<?php echo the_author_meta( 'user_nicename' ); ?> <?php the_time('Y.n.j') ?> <?php if (the_category(', ')) the_category(); ?> <?php edit_post_link('编辑', ' • ', ''); ?>
<!--调出日志摘要-->
<?php the_content(); ?>
<?php endwhile; ?>
<?php endif; ?>
//循环调取日志内容结束(关键)
//调取博客边栏
<?php get_sidebar(); ?>
//调取博客底部
<?php get_footer(); ?>
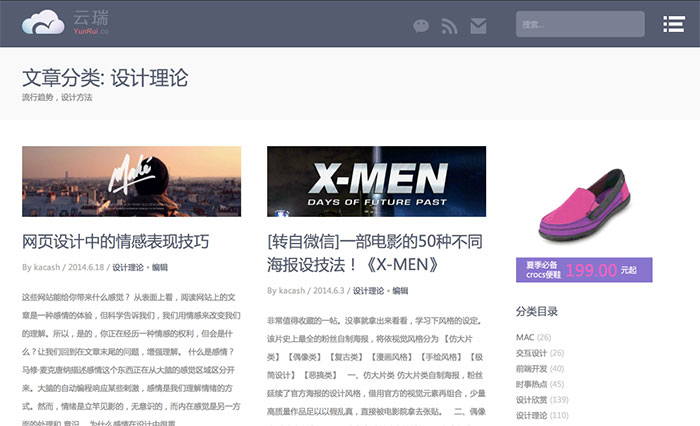
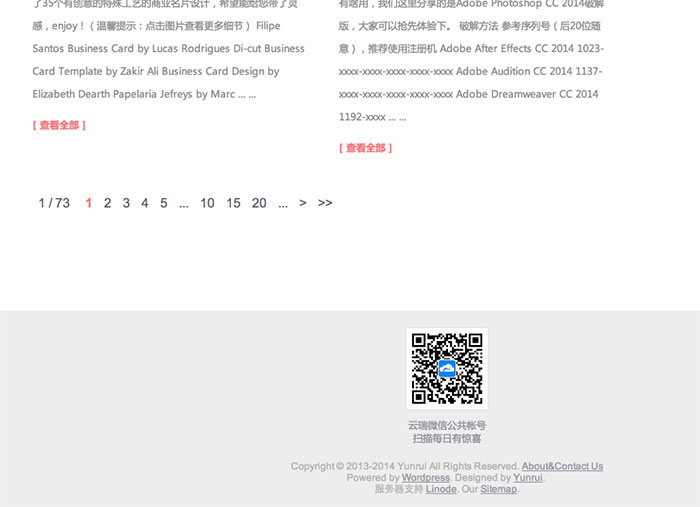
有翻页插件的 请按插件的要求把代码放到该放的位置,yunrui.co 用的的翻页插件是 “WP-PageNavi分页导航” 它要求把代码 “<?php wp_pagenavi(); ?>” 放到 “//循环调取日志内容结束(关键)” 这位置的下面,就可以实现以下效果:
header.php的代码:
//title代码这样写方便SEO
<title><?php wp_title( '|', true, 'right' ); ?></title>
<link rel="pingback" href="<?php bloginfo( 'pingback_url' ); ?>" />
//CSS和JS路径这样写就能自动获取文件路径
<link href="<?php echo get_template_directory_uri(); ?>/style.css" rel="stylesheet" type="text/css">
<script src="<?php echo get_template_directory_uri(); ?>/js/jquery-1.5.1.js" type="text/javascript"></script>
<script src="<?php echo get_template_directory_uri(); ?>/js/silder.js" type="text/javascript"></script>
//加这个函数登录后的顶部工具条才可以正常显示
<?php wp_head(); ?>

//调取搜索框功能模块,调取的就是你之前建立的searchform.php你可以在它里面修改你的搜索表单样式
<?php get_search_form( true ); ?>
sidebar.php 的代码:
正确的把以下代码放到sidebar.php 的HTML中才可以正常在后台使用(外观 》小工具 )中的功能
//正确的吧这些代码放到你的样式中
<?php if ( is_active_sidebar( 'sidebar-1' ) ) : ?>
<?php dynamic_sidebar( 'sidebar-1' ); ?>
<?php endif; ?>
yunrui.co是这样做的:

footer.php的代码:
footer.php里一般是放你的版权信息之类的内容,但是这里必须放一个函数 <?php wp_footer(); ?> 否则底部顶部工具条将不正常显示,而且要将这个函数放到</body>之前,云瑞是这样写的:
<?php wp_footer(); ?>
</body>
</html>
searchform.php中的代码:
你可以在searchform.php修改你的搜索框样式
<form role="search" method="get" id="searchform" action="<?php echo home_url( '/' ); ?>">
<input type="text" value="搜索..." name="s" id="s" >
</form>
至此,首页的代码就完成了。
2.文章详情页(single.php)的代码:
这个页面也很简单,各种关键数据很清晰。
<?php get_header(); ?> <!-- 调取header.php头部模块 -->
<div id="middle" class="clearfix">
<div id="inner">
<div id="content">
<div class="txtCon">
<!-- 开始调取日志 --><?php if ( have_posts() ) while ( have_posts() ) : the_post(); ?>
<article class="" id="post-<?php the_ID(); ?>" <?php post_class(); ?>><!-- 必要的HTML标签 <article></article> -->
<header class="article-title">
<h2 class="myh2"><?php the_title(); ?></h2><!-- 详情页标题 -->
<div class="article-info clearfix">
<div class="meta clearfix">
By <?php echo the_author_meta( 'user_nicename' ); ?> / <?php the_time('Y.n.j') ?> / <?php if (the_category(', ')) the_category(); ?> <?php edit_post_link('编辑', ' • ', ''); ?>
</div> <!-- 博客相关属性 -->
</header>
<div class="article-text">
<?php the_content(); ?>
<?php wp_link_pages( array( 'before' => '<div class="page-link">' . __( 'Pages:', 'twentyten' ), 'after' => '</div>' ) ); ?>
</div>
</article>
<?php comments_template( '', true ); ?><!-- 调取评论模块 -->
<?php endwhile; ?>
</div>
</div>
</div><!--解决IE8问题的标签-->
<!--sildebar here-->
<?php get_sidebar(); ?><!-- 调取sidebar.php边栏模块 -->
</div>
</div>
<?php get_footer(); ?><!-- 调取footer.php底部模块 -->
评论页面(comments.php)相关代码:
这个页面比较复杂,可以不做过多修改,要改样式,就直接调整
<?php /** * The template for displaying Comments. * * The area of the page that contains both current comments * and the comment form. The actual display of comments is * handled by a callback to twentyten_comment which is * located in the functions.php file. * * @package WordPress * @subpackage Twenty_Ten * @since Twenty Ten 1.0 */ ?> <div id="comments"> <?php if ( post_password_required() ) : ?> <p class="nopassword"><?php _e( 'This post is password protected. Enter the password to view any comments.', 'twentyten' ); ?></p> </div><!-- #comments --> <?php /* Stop the rest of comments.php from being processed, * but don't kill the script entirely -- we still have * to fully load the template. */ return; endif; ?> <?php // You can start editing here -- including this comment! ?> <?php if ( have_comments() ) : ?> <h3 id="comments-title"><?php printf( _n( 'One Response to %2$s', '%1$s Responses to %2$s', get_comments_number(), 'twentyten' ), number_format_i18n( get_comments_number() ), '<em>' . get_the_title() . '</em>' ); ?></h3> <?php if ( get_comment_pages_count() > 1 && get_option( 'page_comments' ) ) : // Are there comments to navigate through? ?> <div class="navigation"> <div class="nav-previous"><?php previous_comments_link( __( '<span class="meta-nav">←</span> Older Comments', 'twentyten' ) ); ?></div> <div class="nav-next"><?php next_comments_link( __( 'Newer Comments <span class="meta-nav">→</span>', 'twentyten' ) ); ?></div> </div> <!-- .navigation --> <?php endif; // check for comment navigation ?> <ol class="commentlist"> <?php /* Loop through and list the comments. Tell wp_list_comments() * to use twentyten_comment() to format the comments. * If you want to overload this in a child theme then you can * define twentyten_comment() and that will be used instead. * See twentyten_comment() in twentyten/functions.php for more. */ wp_list_comments( array( 'callback' => 'twentyten_comment' ) ); ?> </ol> <?php if ( get_comment_pages_count() > 1 && get_option( 'page_comments' ) ) : // Are there comments to navigate through? ?> <div class="navigation"> <div class="nav-previous"><?php previous_comments_link( __( '<span class="meta-nav">←</span> Older Comments', 'twentyten' ) ); ?></div> <div class="nav-next"><?php next_comments_link( __( 'Newer Comments <span class="meta-nav">→</span>', 'twentyten' ) ); ?></div> </div><!-- .navigation --> <?php endif; // check for comment navigation ?> <?php /* If there are no comments and comments are closed, let's leave a little note, shall we? * But we only want the note on posts and pages that had comments in the first place. */ if ( ! comments_open() && get_comments_number() ) : ?> <p class="nocomments"><?php _e( 'Comments are closed.' , 'twentyten' ); ?></p> <?php endif; ?> <?php endif; // end have_comments() ?> <?php comment_form(); ?> </div><!-- #comments -->
至此,详情页就可以使用了。
3.tag.php archive.php category.php search.php 等页面的代码:
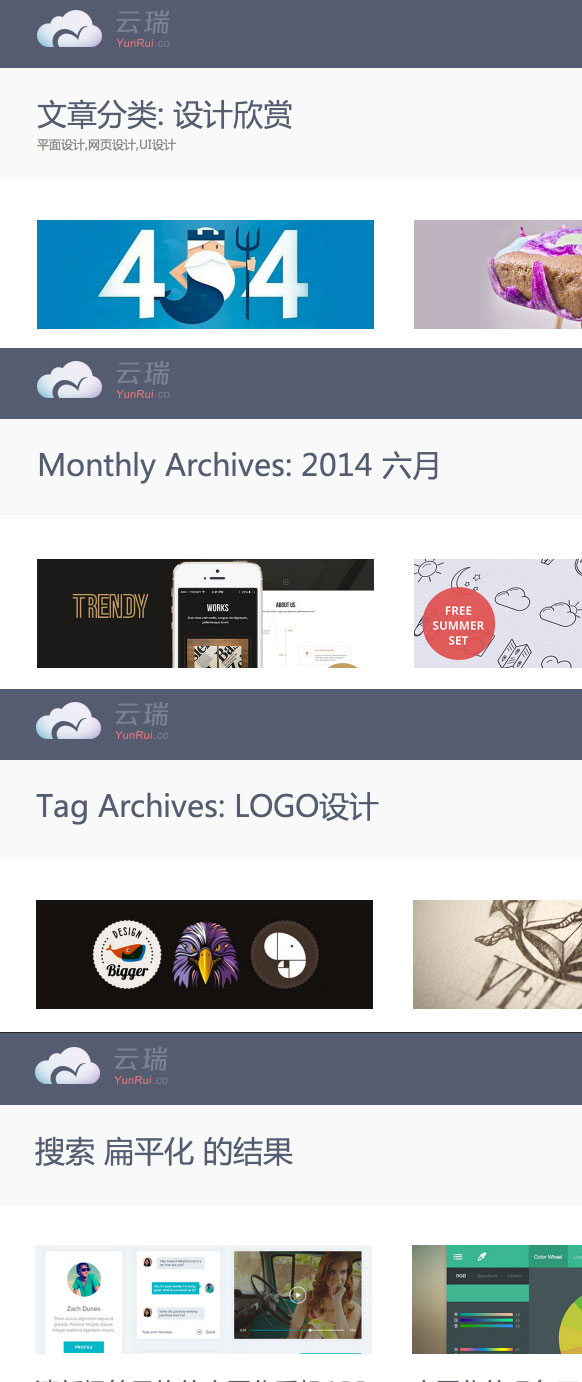
最简单的方式是直接用index.php改这些页面,然后在顶部加一个标题。云瑞的这些页面的标题是这样加的:
//category.php的标题写法
<?php printf( __( '文章分类: %s', 'twentytwelve' ), '<span>' . single_cat_title( '', false ) . '</span>' ); ?>

//archive.php文章归档页面的标题写法
<?php
					if ( is_day() ) :
						printf( __( 'Daily Archives: %s', 'silverblue' ), '<span>' . get_the_date() . '</span>' );
					elseif ( is_month() ) :
						printf( __( 'Monthly Archives: %s', 'silverblue' ), '<span>' . get_the_date( _x( 'Y F', 'monthly archives date format', 'silverblue' ) ) . '</span>' );
					elseif ( is_year() ) :
						printf( __( 'Yearly Archives: %s', 'silverblue' ), '<span>' . get_the_date( _x( 'Y', 'yearly archives date format', 'silverblue' ) ) . '</span>' );
					else :
						_e( 'Archives', 'silverblue' );
endif;?>

//tag.php页面的标题写法
<?php printf( __( 'Tag Archives: %s', 'silverblue' ), '<span>' . single_tag_title( '', false ) . '</span>' ); ?>

//search.php页面的标题写法
<?php printf("搜索 ".'<span>' . get_search_query() . '</span>'  ." 的结果"); ?>
云瑞的几个分类目录页面的效果:
4.404页面:
404页面很简单,但是却很重要,它可以很好的让用户回流。推荐大家看看 《拒绝枯燥!100例有趣的404错误页面设计》能有不错的灵感。
<?php get_header(); ?>
        <div id="middle" class="clearfix">
        	<div id="inner">
            	<div id="content">
                	<div class="txtCon">

        sorry 404!//主要是在这个区域写你404页面的内容

                </div>
            </div>
            <!--sildebar here-->
				<?php get_sidebar(); ?>
        </div>
        </div>
 <?php get_footer(); ?>
至此,博客基本可以正常使用了。
第四步:其他技巧
1.功能函数
function.php这是一套皮肤后台完整功能必备的函数文件,我们把云瑞的分享出来了。
function.php:点击下载
把这个php文件放到你的皮肤根目录里,这样就能正常使用 外观里的各项功能了,而且还可以设置一些必要的信息,如:首页信息缩略图的尺寸。

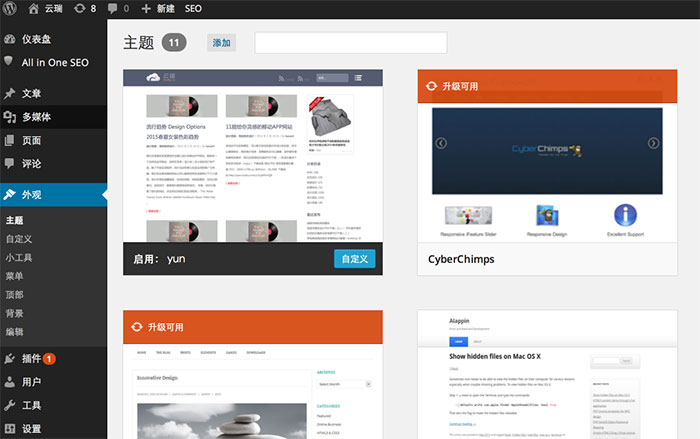
2.皮肤缩略图
皮肤缩略图 命名为screenshot.png,并放置到你的皮肤根目录里,就能在 外观 》主题,里和选用其他皮肤一样选择你自己做的皮肤了。云瑞的效果如下:
总结
WordPress的皮肤制作不难,只要你自己爱研究,会设计,会HTML,就一定可以做出自己满意有好用的皮肤,因为本人也是设计师,所以这套解决方案肯定会有很多问题,有意见希望大家指出,但是目前性能上的问题,页面响应速度都不错。另外希望这几步能帮设计师完成皮肤设计,因为这是针对设计师写的,如果有疑问可以关注微信后留言。
微信ID:gh_c00c591b3f19

![印刷平面设计超级大礼包合集样机下载 [购物袋/包装/礼品盒 PSD,112GB]](https://static.yrucd.com/wp-content/uploads/2020/03/0--300x200.jpg)


![清新脱俗的折页模版下载[indd]](https://static.yrucd.com/wp-content/uploads/2017/11/huacebanner1024.jpg?x-oss-process=style/s1)

![8000+个终极版图标库下载[Ai]](https://static.yrucd.com/wp-content/uploads/2017/03/xiankuangB.jpg?x-oss-process=style/s1)